Ignition 8.3 API Usage Guide (via Postman)
Last revision - 7/30/2025
Ignition 8.3 OpenAPI Documentation
- Login via - http://localhost:8088/data/app/login
- Access OpenAPI docs - http://localhost:8088/openapi

Postman
Setup and Importing Configuration
- Clone the
83-apiGitHub resources from this repository: inductiveautomation/83-api - Import the Collection config file (
8.3.postman_collection_v2.json) from the downloaded repository. This contains the config for all of the base routes and environments for the Resource routes which have been migrated from the IDB. - On the
8.3Collection parent level in Postman, navigate to Collection variables. - Set the desired target gateway address as necessary (default -
localhost:8088) - Generate an API token with write-level access on the test gateway by following the steps below and update the
api_tokenvariable in Postman Collection variables with the token key that's returned.
Steps to Create your first API Token with Proper Security Level Access Assigned
- Under
Platform > Security > Levels, ensure that a write-level Security Level has been created. Access and read permission levels may also be desired and configured at this time. Example of what that would look like:

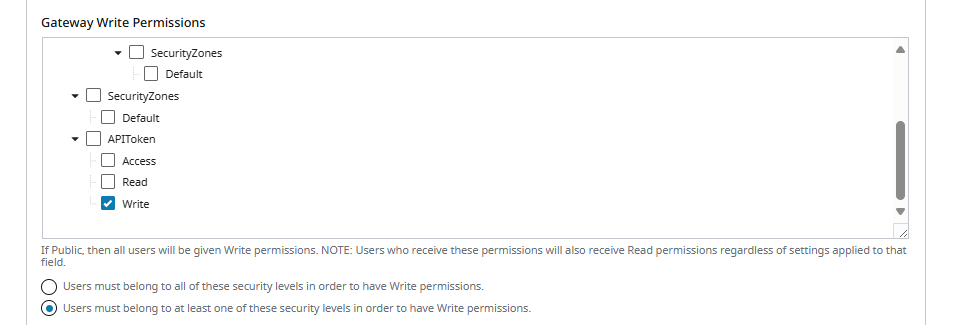
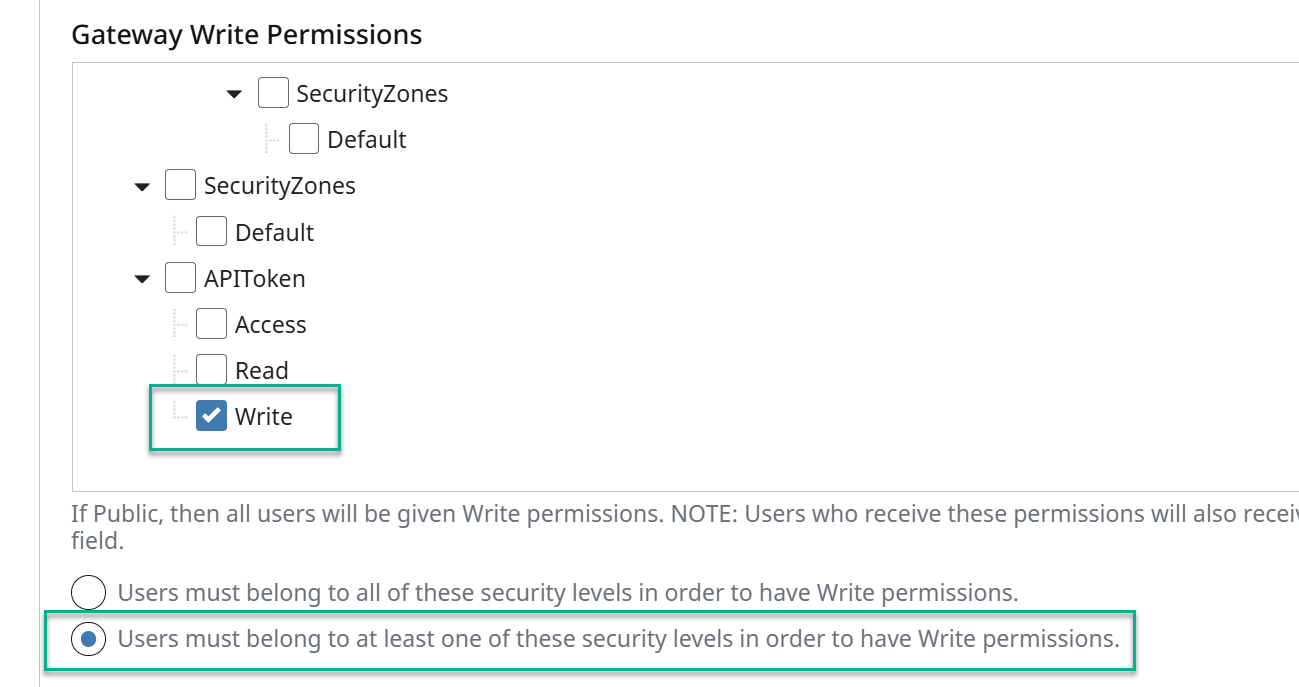
- In
Platform > Security > General Settings, assign the write-level Security Level toGateway Write Permissionsand choose the "AnyOf" option (unless intent is otherwise):
- On the API token, assign the Security Level with write access:

- Find and update the
api_tokenvariable in Postman Collection variables with the token key.
At this point, requests sent using the API token should be properly authorized since write level access has been configured and granted.
✦✦ Ensure that API token(s) are PROTECTED at all times, as they are the keys to the kingdom that is Ignition
✦✦
Some Important Notes
-
**Protip: Copy the generated token resource files from
data/config/resources/CORE/ignition/api-tokenintodata/config/resources/EXTERNAL/ignition/api-tokenwhich sits at a higher inheritance level than core as resources in core may be deleted at will during testing and development (ie. see the "Retriggering Migration" section down below).
- A gateway restart is required after this since resource files have been affected directly on the filesystem (or alternatively run the Config Sync Request route) so that the system will pick up the new resource changes on the filesystem.
- Any gateway config resource that is edited directly on the filesystem does not automatically picked up unless the Config Sync Request route is called which prompts the gateway to sync changes immediately.
-
Be sure to hit Save in Postman after modifying any variables to apply the changes, or they will not take effect!

Config Usage
The imported 8.3 Collection contains all of the base routes for the new 8.3 API resource routes. The route types can essentially be broken down into 3 categories. With each of these, there are slight differences in the routes. Routes that only apply to specific resource types (eg. Singleton vs. Non-singleton (ie. Named Resource and Extension Point types) have been organized into their respective Resource types. Additional info can be found for a particular resource by running the Describe Type route:

Resource Route Categories
Singletons
- Examples:
ignition/cobranding,sfc/chart-settings
Named Resources
- Examples:
ignition/alarm-journal, database-connection, database-driver, database-translator, schedule, holiday, images- Note that
ignition/imagescontains no routes because they’re expected to be managed through Image Management in the Designer.
- Note that
Extension Points
- Examples:
ignition/api-token, schedule
The general process for CRUD of any of these resource types using the imported Postman configs is essentially the same. The api_token Collection variable that was set during setup comes in handy as all of the requests have already been preconfigured with the X-Ignition-API-Token header which references that variable. Other subsystem-specific variables have also been added in the form of Environment configs to allow quick switching between the different contexts as will be shown in the examples below.
For each of the requests below, be sure to switch to the desired Environment (or create new if one doesn’t already exist):

Create Resource
- Update the
payload_createEnvironment variable with the desired config parameters. - Run the
Create Resourcesroute.
Read Resource
- Named Resource or Extension Points: Run the
Non-singleton/Find Resourcesroute. - Singletons: Run the
Singleton/Detailsroute.
Update Resource
-
Updating and/or renaming resources will require that the correct signature for the existing resource be included. The
Non-singleton/Find ResourcesandSingleton/Detailshave been preconfigured with post-run scripts that set thesignatureEnvironment variable when locating the resource. So first run either of those. -
And then run the desired
Modify ResourcesorNon-singleton/Renameroutes to modify the existing named resources or extension points. -
Make sure to update
payload_modifyand/orrenameEnvironment variables as necessary
Delete Resource
- Resource deletion also requires a signature match so similar to the steps for updating/renaming resources, run the
Non-singleton/Find ResourcesorSingleton/Detailsroutes first to grab the corresponding signature. - And then run the
Singleton/Delete ResourceorNon-singleton/Deleteroutes.
Development Modes
Usage of the Development Mode CRUD routes are fairly straightforward. Simply switch to the modes Environment before running and updating the variables with the desired values before running.
Gateway Config and Project Sync
Recall that the Request Configuration Scan route is useful for syncing any gateway config changes made directly on the filesystem without requiring a gateway restart. Request Project Scan does the same except with project file changes. Their respective Sync Info routes do just as their name implies to return info about the last known sync request.
8.3 Gateway Config Migration
Basic Overview of Migration Process
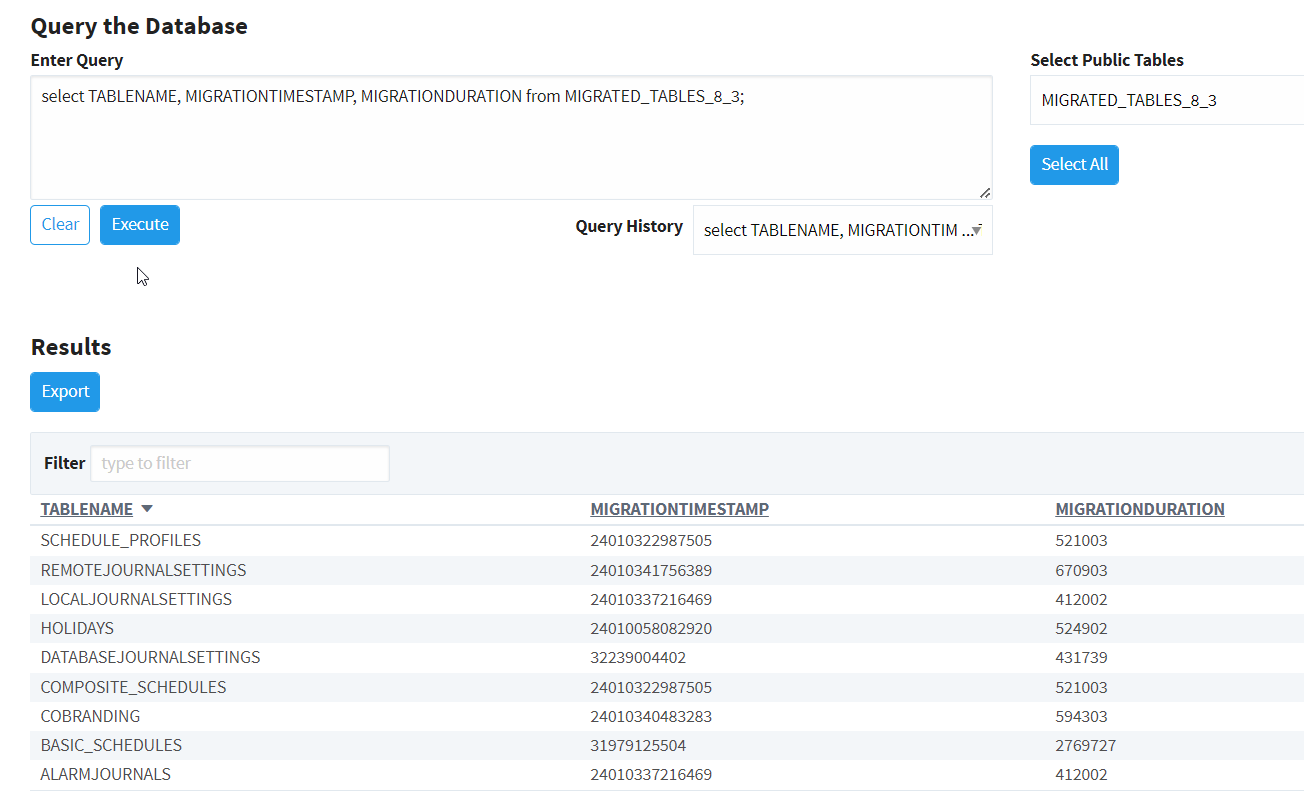
The migration process takes place at the beginning of each gateway startup. The gateway will look for any tables in the Internal IDB that have a migration strategy implemented and performs a migration of the configuration found in the applicable table into resource files which are stored in the data/config/resources/core directory within their respective resource type folders. Once this migration has been completed, the IDB table name is added to the MIGRATED_TABLES_8_3 IDB table for record keeping so that the migration does not have to be performed again during the next gateway startup.
![]()
Retriggering Migration
Knowing this, it may be useful to retrigger migration for various reasons (eg. to quickly configure config settings in the old system using the existing Wicket pages and triggering migration to bypass the new WebUI ![]() ). The procedure to do this is as follows:
). The procedure to do this is as follows:
- Delete the desired table(s) from the MIGRATED_TABLES_8_3 IDB table
- Remove the corresponding resource files from
data/config/resources/core(because migration will not complete properly/entirely if duplicate resource files are found for a particular resource) - Restart the gateway.
Alternatively to simply retrigger migration for all resources:
- Drop the MIGRATED_TABLES_8_3 IDB table
- Delete
data/config/resources/core - Restart the gateway. **Important note that any specific resources can be saved prior to deleting core and copied back in post migration if you wish to keep them (good example -
ignition/api-token).
API Auth Token for Routes
Additional API tokens can be generated via the ignition/api-token resource to use with the X-Ignition-API-Token header for proper authentication in requests.