Hi, how do i tell a tag value to be inserted to the table?
i have a dropdown list where example the value “Test” is selected, what i want to happen is when that value is selected from the drop down, the value of the tag will be inserted to the first row in the table, how do i do that?
I saw that there is a setValue in the manual i think that’s what i need but how do i use it?
thanks in advance
You’ll need to put a script on the propertyChange event handler of the dropdown, and then verify that the correct property is changing:
if event.propertyName == "selectedValue":
You can then use addRow() on a table instance:
event.source.parent.getComponent("Table").addRow([])
You would put the dataset of values (comma separated) inside the brackets. Make sure that the number of values equal the number of columns in the table, and that the values can be coerced to the column datatype.
EDIT: It looks like the post I was replying to was deleted, but I’ll leave my response here if others were curious about why the propertyChange event handler was used.
The propertyChange event only executes when a property of a given component has changed. Specifically, you’re interested in the “selectedValue” property of the dropdown, right? Adding that line of code I referenced earlier will ensure the propertyChange event fires only if the selectedValue of the dropdown is changed, and then that selected value gets added to the table.
Ok, so i don’t know if I did this correctly.
I entered this in the property change event of the dropdown
if event.propertyName == “selectedValue”:
event.source.parent.getComponent(“Table 1”).addRow([0,2,“05A FIT”])
and then inserted this on the mouse click event
table = event.source.parent.getComponent(“Table 1”)
dropdown = event.source.selectedValue
if dropdown == “OU2-11-A”:
table = setValue(2,2,“05A FIT”)
the value of the tag (05A FIT) wasn’t added to the value, what did i do wrong? i kind of just started using ignition and python, i’m really sorry about all this questions
You’re on the right track with the propertyChange, but don’t worry about mouseClicked, you’re only concerned about when the value of the dropdown box changes. So you’ll first check to see if the property that changed is the right property, then you’ll check to see if the changed property is a specific string, and then add the value to the table. Also, to pull in a tag value in scripting, you have to use system.tag.read().value. So your propertyChange script looks like this:
if event.propertyName == "selectedLabel":
	if event.source.selectedLabel == "tag":
		event.source.parent.getComponent("Table").addRow([1, system.tag.read("tagpath").value])
You can interchange selectedLabel with selectedValue, depending on how you structured your dropdown box dataset.
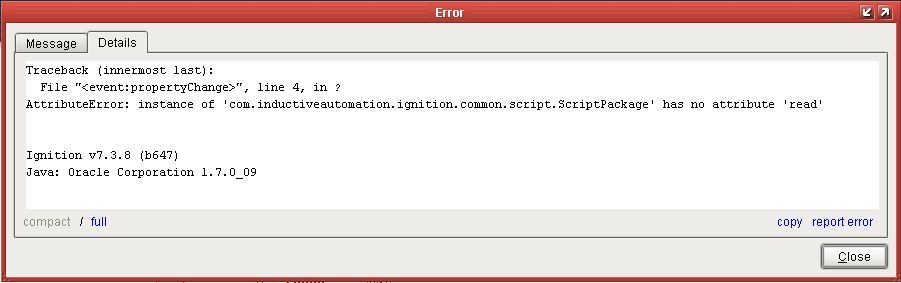
Ok so i tried that code and pasted it on the propertychange event and changed the other details like the tag, tagpath and table name and I got this error (errordetails.jpg) so what did was i tried to do it like this just
if event.propertyName == "selectedLabel":
	if event.source.selectedLabel == "tag":
		tag = system.tag.read("tagpath")
		event.source.parent.getComponent("Table").addRow([1, tag.value])
but i’m still having that error saying that there’s no ‘read’ attribute
Since you’re using 7.3.8 you’ll want to use system.tag.getTagValue() instead of system.tag.read().value. The read() function was added in 7.5.
Finally! It worked. 
Last one though, I kind of already have the tables layout, 5 columns and 10 rows. I don’t want it to add rows just insert it to the rows and columns that are already there, what should i use instead of addrow?
In that case you’ll want to use updateRow, which takes two parameters: the row index, and a PyDictionary of column names/indices and new values. Here’s an example of editing the third row of a table with columns “a” and “b” with values 23 and 24:
event.source.parent.getComponent("Table").updateRow(2,{"a":23,"b":24})
or
event.source.parent.getComponent("Table").updateRow(2,{0:23,1:24})